Radiator Repair vs. Replacement Decision Tool
Diagnosis Checklist
Select all issues that apply to your vehicle.
Recommendation
How to use this tool
Follow the visual inspection steps below to identify the condition of your radiator.
- Check for visible leaks or puddles.
- Inspect the plastic tanks and metal fins.
- Note the age of your current radiator.
- Select the matching symptoms in the checklist.
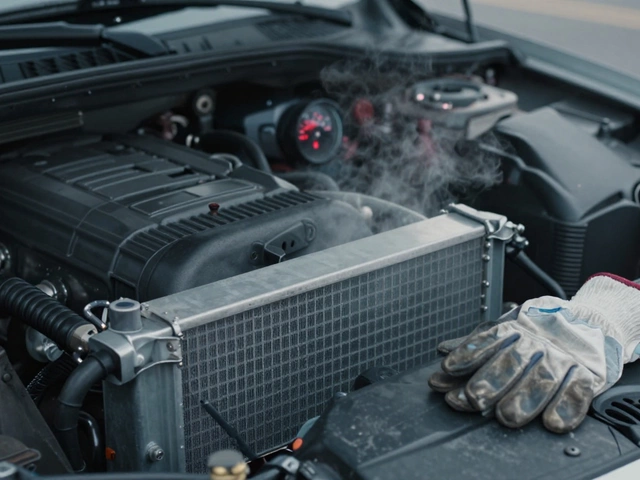
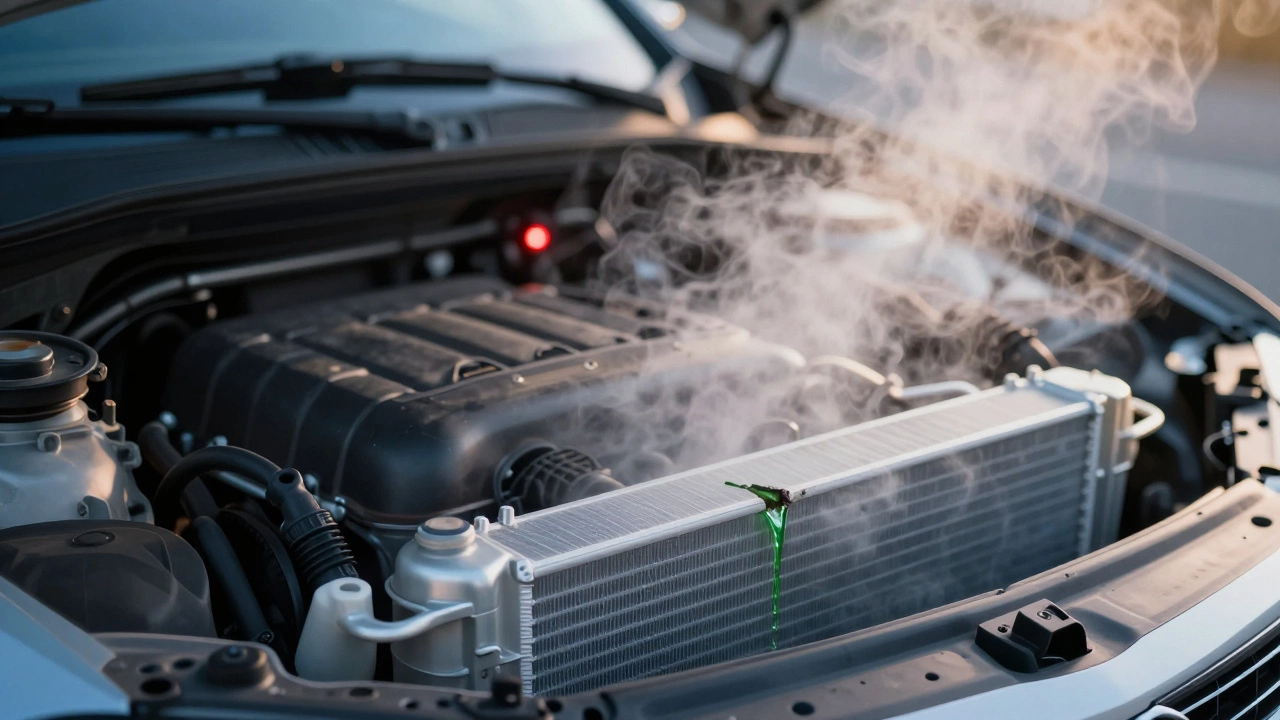
Your dashboard light turns red. Steam hisses from under the bonnet. The temperature gauge climbs into the danger zone. It’s the worst feeling for any driver: your car is overheating, and you’re stuck wondering if you can just patch up the radiator the heat exchanger component that cools engine coolant or if you need to buy a brand-new one.
The short answer? Sometimes yes, sometimes no. But it depends entirely on what’s actually broken. A small leak in the plastic tank might be fixable with epoxy or a clamp. A corroded core inside the metal fins usually isn’t. Getting this wrong doesn’t just mean a tow truck bill; it means risking catastrophic engine damage from lack of cooling.
Let’s break down exactly when you can save money by repairing your radiator and when you should cut your losses and replace it. We’ll look at the specific failure points, the DIY fixes that actually work, and the signs that say "stop trying."
Diagnosing the Problem: Is It Really the Radiator?
Before you buy any sealant or new parts, you have to be sure the radiator is the culprit. Many drivers assume an overheating engine means a bad radiator, but the issue could be elsewhere in the cooling system. If you fix the radiator but ignore a stuck thermostat, you’ve wasted your time.
Start by looking for visible leaks. Park the car on a clean piece of cardboard overnight. In the morning, check for puddles. Green, orange, or pink fluid indicates coolant loss. Look closely at the radiator itself. Are there wet spots on the plastic tanks at the top or bottom? Is there corrosion eating through the aluminum fins?
If there are no external leaks, the problem might be internal. Check your oil dipstick. Does the oil look like a chocolate milkshake? That’s emulsified oil, meaning coolant is leaking past head gaskets into the engine block. This isn’t a radiator fix; it’s a major engine repair. Similarly, if you see bubbles in your overflow reservoir while the engine is running, you likely have combustion gases entering the cooling system. Again, this points to a head gasket failure, not a radiator issue.
For a simple radiator diagnosis, pressure test the system. You can rent a cooling system pressure tester from most auto parts stores in Manchester or anywhere else. Pump the system to its rated pressure (usually 15-18 PSI). If the pressure drops without visible leaks, you have an internal leak within the radiator core. This is often unrepaired by DIY methods.
When You Can Fix It: Minor Leaks and Blockages
There are two main scenarios where fixing the radiator is a viable, cost-effective option: minor physical damage to the plastic tanks and clogged passages due to neglect.
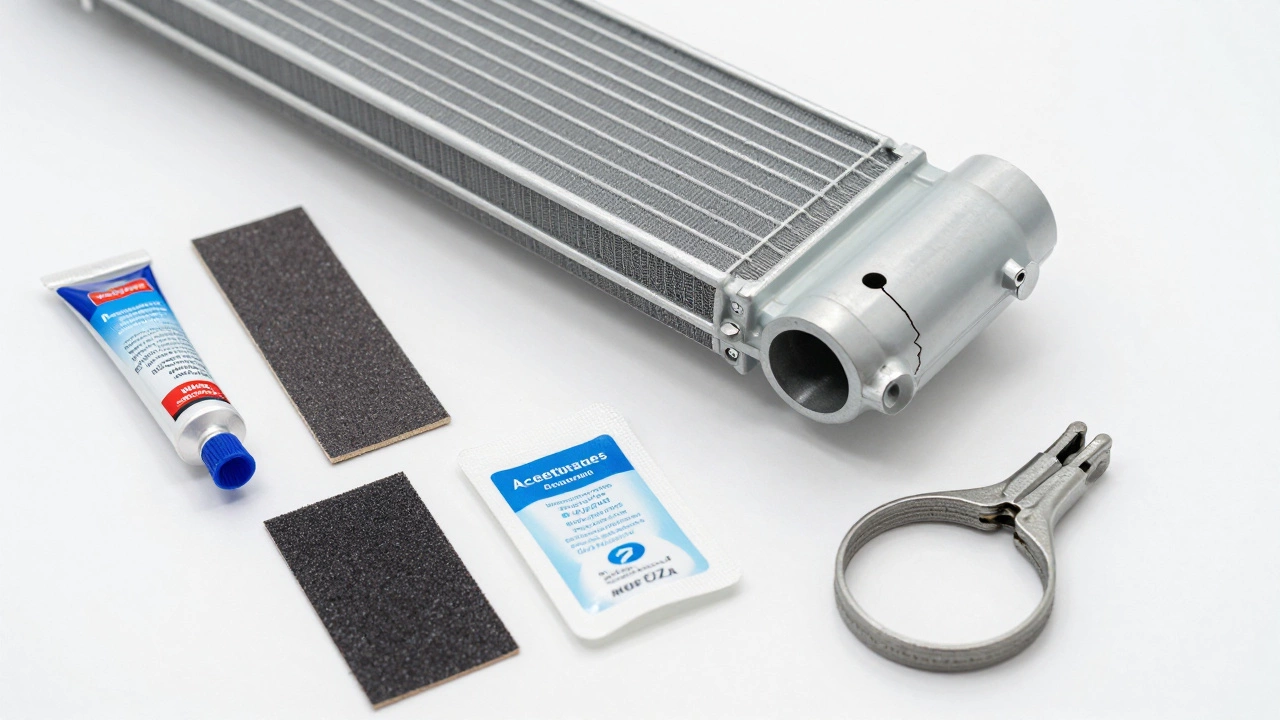
Plastic Tank Cracks: Modern radiators use plastic end tanks connected to aluminum cores. These plastic parts are prone to cracking from vibration or impact. If the crack is small (less than 6mm) and located on the flat face of the tank, you can often repair it.
- Epoxy Repair Kits: Specialized radiator epoxy putties exist for this purpose. Clean the area thoroughly with acetone. Roughen the surface with sandpaper. Apply the epoxy according to instructions. Let it cure completely-usually 24 hours-before refilling.
- Radiator Clamps: For larger cracks in accessible areas, heavy-duty hose clamps or specific radiator repair clamps can bridge the gap. This is a temporary fix but can get you home or to a shop safely.
Clogged Passages: If your car hasn’t had a coolant flush in five years, sediment and rust can build up inside the radiator tubes, restricting flow. This causes overheating even if there are no leaks.
- Backflushing: Remove the radiator hoses. Use a garden hose to flush water backward through the radiator outlet. Repeat until the water runs clear. This removes loose debris.
- Chemical Flush: Pour a radiator flush chemical into the system, run the engine with the heater on high for 15 minutes, then drain and rinse. This dissolves mineral deposits.
If flushing restores proper coolant flow and temperatures return to normal, you’ve successfully "fixed" the performance issue without replacing the part.
When You Must Replace It: Core Damage and Severe Corrosion
Not everything can be glued or flushed. Attempting to repair severe damage is dangerous because a failed repair while driving can lead to sudden coolant loss and engine seizure.
Corroded Aluminum Fins: If the metal fins between the plastic tanks are pitted, greenish-white crusty, or crumbling, the structural integrity is gone. You cannot weld aluminum easily without specialized equipment, and epoxy won’t hold against the constant vibration and heat cycles of an engine bay. This requires a full replacement.
Internal Tube Leaks: As mentioned earlier, if a pressure test shows dropping pressure but no external wetness, the tubes inside the core are leaking. There is no way to access these individually. The entire unit must be replaced.
Cracked Plastic Tanks (Large/Angle): If the crack is on the edge of the tank or near a hose connection, the stress concentration is too high for epoxy. The plastic will flex, and the bond will fail quickly. Replace the radiator.
Old Age: Radiators typically last 5 to 10 years. If your radiator is 12 years old and has one small leak, don’t patch it. The rest of the unit is likely weakened. Replacing it now prevents a breakdown later.
| Issue Type | Severity | Action | Estimated Cost (UK) |
|---|---|---|---|
| Small Plastic Crack | Minor (<6mm) | Repair (Epoxy/Clamp) | £10 - £30 (DIY) |
| Clogged Passages | Moderate | Flush & Clean | £20 - £50 (DIY/Labor) |
| Large Plastic Crack | Major (>6mm or Edge) | Replace Radiator | £150 - £400 (Parts+Labor) |
| Core Corrosion | Severe | Replace Radiator | £150 - £400 (Parts+Labor) |
| Internal Leak | Critical | Replace Radiator | £150 - £400 (Parts+Labor) |
The Risk of "Stop-Leak" Products
You’ll find bottles of "radiator stop-leak" at every gas station. They promise to seal leaks instantly. Should you use them?
Generally, no. These products contain polymers or metallic particles that circulate in your coolant until they find a hole. While they might plug a tiny pinhole in the radiator, they also clog the narrow passages in your engine’s water pump, heater core, and cylinder head.
I’ve seen mechanics pull apart engines where the heater stopped working because the cabin heater core was blocked by stop-leak sludge. Worse, if the leak is large, the product simply washes out, giving you false confidence before you suffer a total coolant loss. Use these only as a last-resort emergency measure to drive a few miles to a garage, not as a permanent fix.
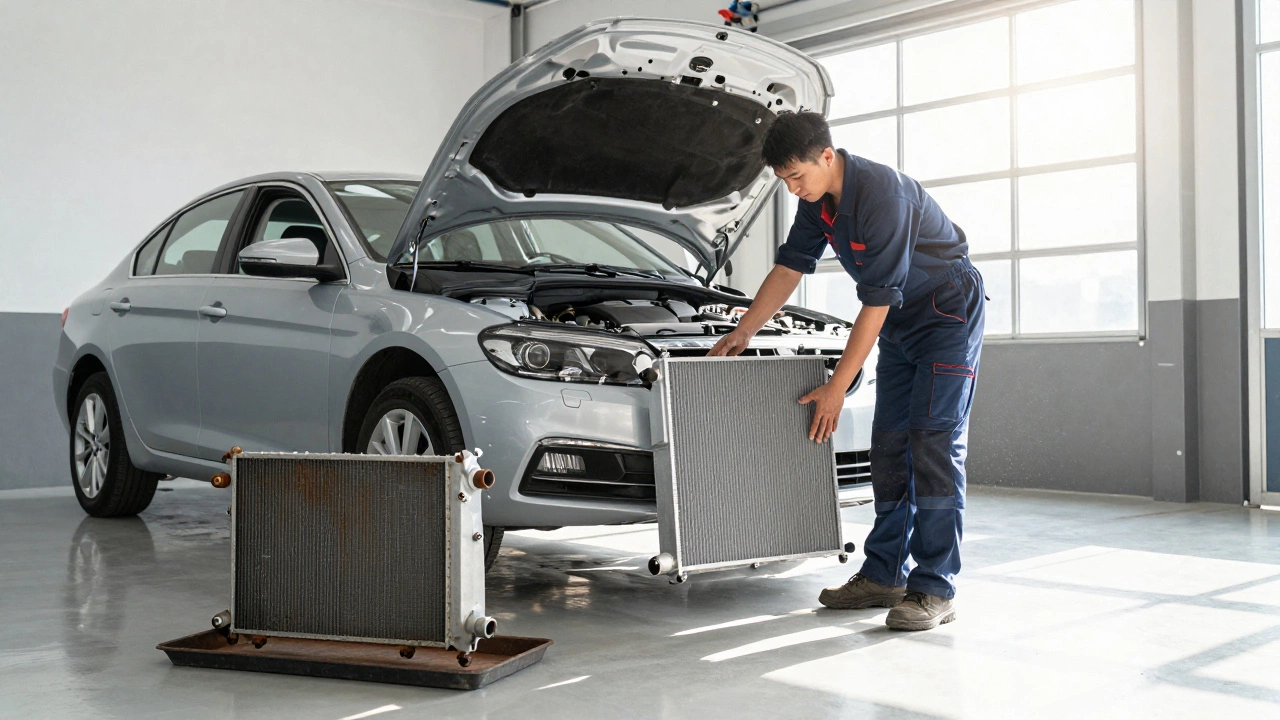
How to Replace a Radiator: A Step-by-Step Overview
If you’ve decided replacement is necessary, here is what the process involves. You can do this yourself if you’re comfortable with basic tools, or take it to a mechanic.
- Drain the Coolant: Place a pan under the radiator. Open the drain petcock (if equipped) or disconnect the lower hose. Allow the old coolant to drain completely. Dispose of it properly at a recycling center; never pour it down the drain.
- Disconnect Hoses and Electrical: Unclip the upper and lower radiator hoses. Disconnect the electric fan wiring harness and any temperature sensors attached to the radiator neck.
- Remove Mounting Brackets: Most radiators are held in place by rubber mounts or metal brackets bolted to the chassis. Remove these bolts carefully.
- Lift Out Old Radiator: Gently lift the radiator straight up and out. Be careful not to bend the new one if you’re swapping directly.
- Install New Radiator: Lower the new unit into place. Ensure the mounting tabs align perfectly. Reinstall brackets and tighten bolts to manufacturer torque specs.
- Reconnect Hoses and Sensors: Attach new hoses if the old ones are cracked. Reconnect all electrical plugs.
- Refill and Bleed: Fill with fresh 50/50 coolant mixture. Start the engine with the hood open. Run the heater on max to bleed air pockets. Top off the reservoir as needed.
Note: Always replace the thermostat and coolant hoses if they are more than 5 years old. Since you’re already paying for labor or doing the work, why not prevent future failures?
Preventing Future Radiator Failure
A new radiator is useless if you don’t maintain the cooling system. Here’s how to extend its life beyond the typical 10-year mark.
Regular Coolant Flushing: Coolant loses its anti-corrosion properties over time. Manufacturers recommend flushing every 30,000 to 60,000 miles. Don’t skip this. Old coolant turns acidic and eats away at aluminum and rubber seals.
Check Levels Monthly: Keep an eye on your overflow reservoir. A slow drop in level indicates a small leak. Catching it early allows for cheap repairs rather than expensive replacements.
Inspect Hoses Annually: Squeeze your radiator hoses. They should feel firm but slightly spongy. If they’re hard, brittle, or mushy, replace them. A burst hose can damage the radiator face upon impact.
Clean the Fins: Dirt, bugs, and leaves pack into the radiator fins, insulating them and reducing cooling efficiency. Use compressed air or a gentle stream of water (from the engine side out) to clean the fins during routine maintenance.
Can I use JB Weld to fix a radiator?
JB Weld is a strong epoxy, but it is not designed for the extreme thermal cycling and vibration of a car radiator. While it might hold temporarily on a static plastic tank, it often fails under heat expansion. Use epoxies specifically labeled for automotive radiators, which contain flexible agents to handle movement.
Is it cheaper to repair or replace a radiator?
Repairing is cheaper only for minor plastic cracks (£10-£30 for materials). However, labor costs make professional repairs rarely worthwhile. A new aftermarket radiator costs £150-£300 plus labor. If the repair is temporary, you may pay again soon. Replacement offers long-term reliability and is usually the better financial choice for core damage.
How long does a repaired radiator last?
A properly executed epoxy repair on a plastic tank can last several months to a year, depending on the size of the crack and vibration levels. However, it is considered a temporary fix. Once a radiator is patched, it is weaker and more prone to further failure. Plan to replace it within 6-12 months.
What happens if I drive with a leaking radiator?
Driving with a leaking radiator risks severe engine damage. As coolant drops, the engine overheats. This can warp cylinder heads, blow head gaskets, or cause pistons to seize. Repairing an overheated engine costs thousands, far exceeding the price of a new radiator. Stop driving immediately if you suspect a leak.
Do I need to replace the thermostat when replacing the radiator?
It is highly recommended. Thermostats are inexpensive (£10-£20) and prone to sticking closed, which causes overheating. Since you are already draining the coolant and removing components, replacing the thermostat ensures your new radiator works efficiently. It prevents a repeat visit to the mechanic.