Suspension Health Diagnostic Tool
Answer the following questions about your vehicle's current behavior to receive a preliminary diagnosis of potential suspension issues.
*This tool provides general guidance based on common symptoms. Always consult a certified mechanic for definitive repairs and safety inspections.
You’re driving down a familiar stretch of road, and suddenly your car feels… wrong. Maybe it’s a thud when you hit a pothole, or perhaps the steering wheel shimmies at 60 mph. It’s easy to ignore these signs until they become expensive repairs. But here’s the thing: most suspension problems are loud and obvious if you know what to listen for. You don’t need a mechanic’s degree to spot them; you just need to know where to look and what sounds mean trouble.
Suspension isn’t just about comfort. It keeps your tires glued to the tarmac. If it fails, your braking distance increases, and your handling becomes unpredictable. Let’s walk through how to diagnose issues before they leave you stranded on the side of the motorway.
Listen First: Decoding Suspension Noises
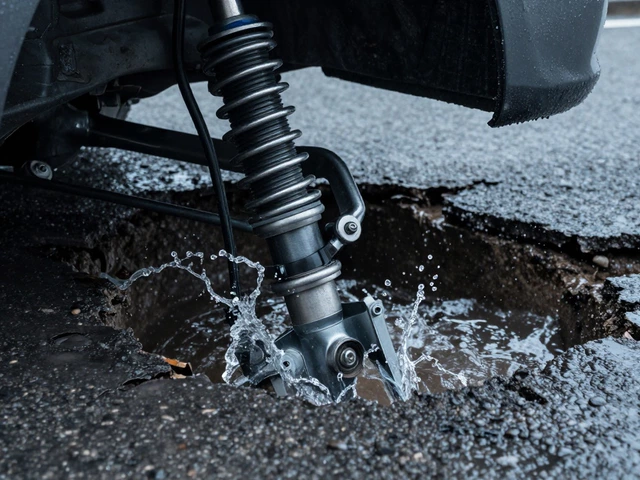
Your ears are your best diagnostic tool. Different noises point to different failing parts. If you hear a knocking sound when going over bumps, suspect worn shock absorbers or struts that have lost their damping ability. These components control spring movement. When they wear out, the springs bounce uncontrollably, causing metal-on-metal contact or bottoming out.
A squeaking noise usually points to dry or cracked bushings, which are rubber sleeves that isolate metal parts from each other. Think of them as cushions between the control arm and the chassis. When they harden with age, they lose flexibility and start to chirp against the metal frame. Greasing them might help temporarily, but replacement is often the only permanent fix.
If you hear a clunking sound when turning the steering wheel, look at the CV joints or ball joints. While CV joints are part of the drivetrain, they work closely with suspension geometry. Ball joints connect the control arms to the steering knuckles. If they wear out, the joint loosens, creating that distinct "clunk" during sharp turns or lane changes.
The Bounce Test: Checking Shock Absorbers
You can test your shocks in under two minutes without getting under the car. Park on a flat surface. Push down firmly on one corner of the bumper until it hits its limit, then let go abruptly. Watch how the car rebounds.
- Good condition: The car should bounce once or twice and settle immediately.
- Worn condition: The car continues to bounce up and down like a pogo stick for three or more cycles.
Repeat this for all four corners. Uneven bouncing suggests specific failures. For example, if the front left bounces excessively while the right settles quickly, you likely have a failed strut on the left side. This imbalance causes uneven tire wear and poor handling stability.
| Symptom | Likely Cause | Urgency Level |
|---|---|---|
| Excessive bouncing after bumps | Worn shock absorbers or struts | Moderate (affects safety) |
| Squeaking over small bumps | Dry or cracked bushings | Low (comfort issue) |
| Clunking when turning | Worn ball joints or tie rod ends | High (steering failure risk) |
| Car pulls to one side | Misalignment or collapsed spring | Moderate (tire wear) |
| Vibration at high speed | Bent rim or unbalanced tire | Low to Moderate |

Visual Inspection: What to Look For
Noise tells you something is wrong, but visual inspection tells you exactly what. Grab a flashlight and get low. You’re looking for physical damage or leakage.
Start with the coil springs, which support the vehicle's weight. Check for cracks near the mounting points. A broken coil spring doesn’t always collapse instantly; sometimes it just loses tension, making one corner sit lower than the others. Measure the height from the wheel arch to the ground on both sides. If there’s a difference of more than half an inch, inspect the springs closely.
Next, examine the shock absorbers. Look for oil leaks. Shocks contain hydraulic fluid. If the casing is wet or covered in grime, the seal has failed. A leaking shock is useless because it can’t dampen motion effectively. Replace them in pairs-always front or rear together-to maintain balanced handling.
Check the tie rod ends, which connect the steering rack to the wheels. Grip the tire at the 3 o’clock and 9 o’clock positions and try to wiggle it. There should be minimal play. If the tire moves noticeably back and forth, the tie rods or ball joints are worn. Excessive play here means your steering will feel loose and imprecise.
Tire Wear Patterns: The Silent Clues
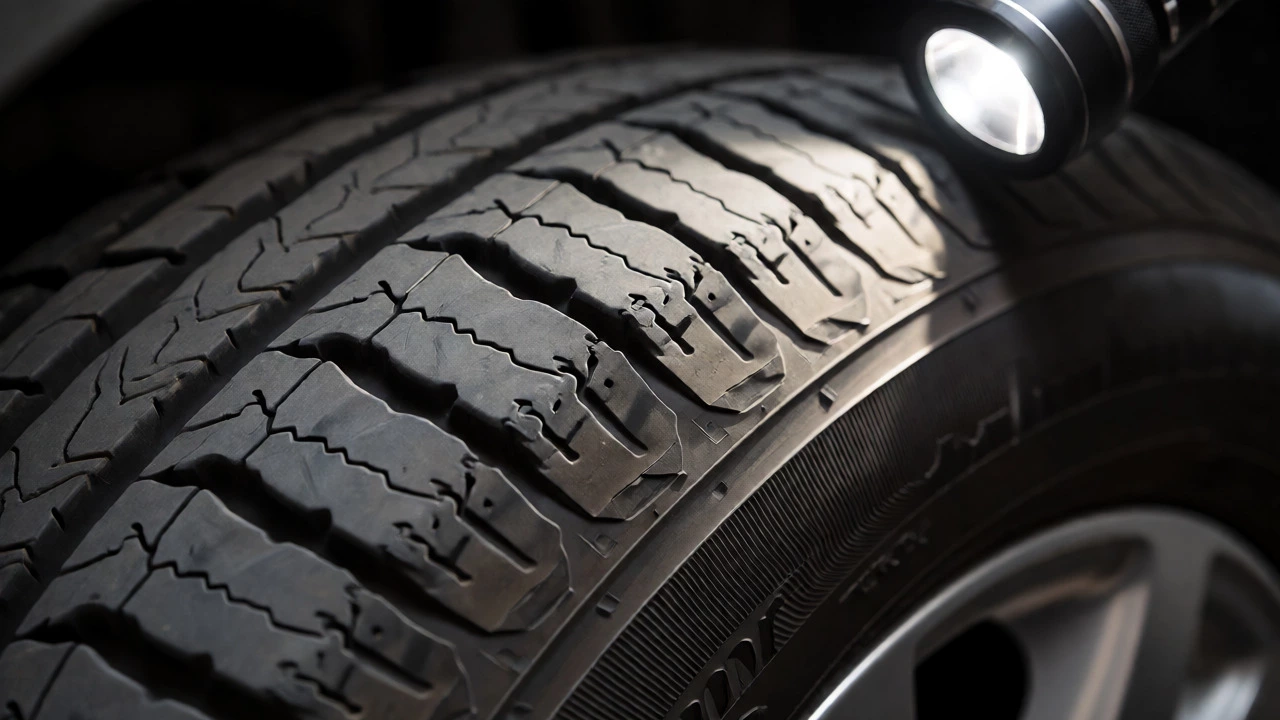
Your tires tell a story about your suspension. Inspect the tread depth across the width of the tire. Uniform wear means everything is aligned and balanced. Specific patterns indicate specific faults.
If the inner edge wears faster than the outer edge, you likely have excessive negative camber, often caused by sagging springs or bent control arms. Conversely, if the center wears faster, your tire pressure might be too high, or the suspension is too stiff for the load.
Cupping or scalloping-where the tread looks like it has scoops taken out of it-is a classic sign of worn shock absorbers. The tire hops slightly on the road surface instead of staying planted, causing uneven contact patches. If you see cupping, replace the shocks immediately. Rotating tires won’t fix this; it’s a mechanical failure.
Steering Feel and Handling Changes
Sometimes the problem isn’t a noise, but a feeling. Does the car wander on straight roads? Do you constantly correct the steering wheel? This suggests alignment issues or worn stabilizer bar links.
The stabilizer bar (also called an anti-roll bar) reduces body roll during turns. Its links connect the bar to the suspension arms. If a link breaks or wears out, you’ll hear rattling over bumps and notice increased lean in corners. Replacing these links is cheap and easy, often costing less than £50 for parts.
If the steering feels heavy or notchy, check the power steering fluid level and the pump. However, if the fluid is fine, the issue might be the steering rack itself. Leaks around the rack boots indicate internal seal failure. Ignoring this leads to complete loss of power assist, making the car difficult to maneuver at low speeds.
When to DIY vs. When to Call a Pro
You can handle many suspension checks yourself. Listening for noises, performing the bounce test, checking tire wear, and replacing simple links or bushings are manageable for home mechanics with basic tools.
However, some jobs require professional equipment. Replacing coil springs involves compressing high-tension springs, which can be dangerous if not done correctly. Similarly, aligning the wheels requires precise machinery to ensure toe, camber, and caster angles meet manufacturer specs. If you’ve replaced multiple components, get a professional alignment afterward. Otherwise, you’ll waste new parts on bad geometry.
Remember, suspension work affects safety. If you’re unsure about a component’s role or installation torque specs, consult a mechanic. It’s better to pay for labor now than to buy new tires later due to improper setup.
Can I drive with bad suspension?
You can drive short distances, but it’s risky. Bad suspension increases stopping distances and makes the car harder to control in emergencies. If you hear loud clunks or feel significant wobbling, limit your speed and avoid highways until repaired.
How much does it cost to fix suspension issues?
Costs vary widely. Simple fixes like replacing stabilizer links might cost £100-£200 including labor. Replacing shocks and struts on one axle could range from £400 to £800. Major repairs involving control arms and springs can exceed £1,000 depending on the vehicle model.
Do I need to replace suspension parts in pairs?
Yes, always replace shocks, struts, and springs in axle pairs (both fronts or both rears). Replacing only one side creates uneven damping, leading to poor handling and accelerated wear on the remaining old part.
What causes suspension noises in cold weather?
Cold temperatures make rubber bushings and mounts stiffer. This can cause temporary squeaking or creaking until the components warm up. If the noise persists after driving for ten minutes, it likely indicates actual wear rather than just temperature effects.
How often should I check my suspension?
Inspect your suspension visually every time you change your oil. Perform a full bounce test and tire wear check every 10,000 miles. Professional inspections are recommended annually or if you notice any changes in ride quality.