Clutch Replacement Cost Estimator
Configuration
Cost Breakdown
DIY Total
Professional Garage
So, you’ve heard the grinding noise when shifting gears, or maybe your foot is dancing on the pedal just to get into third gear. The verdict from the mechanic was likely what you feared: "You need a new clutch." Now comes the real question that keeps many drivers up at night: Is replacing a clutch easy?
The short answer? No. It is not "easy" in the same way changing an oil filter or swapping brake pads is. But it is not impossible, either. For a competent DIYer with the right tools and a weekend’s worth of patience, it is absolutely doable. For someone who has never touched a transmission, it might be a recipe for disaster.
Let’s break down exactly what makes this job tricky, what goes into a proper clutch kit, and whether you should grab a wrench or call a pro.
Why Clutch Replacement Isn’t a Quick Fix
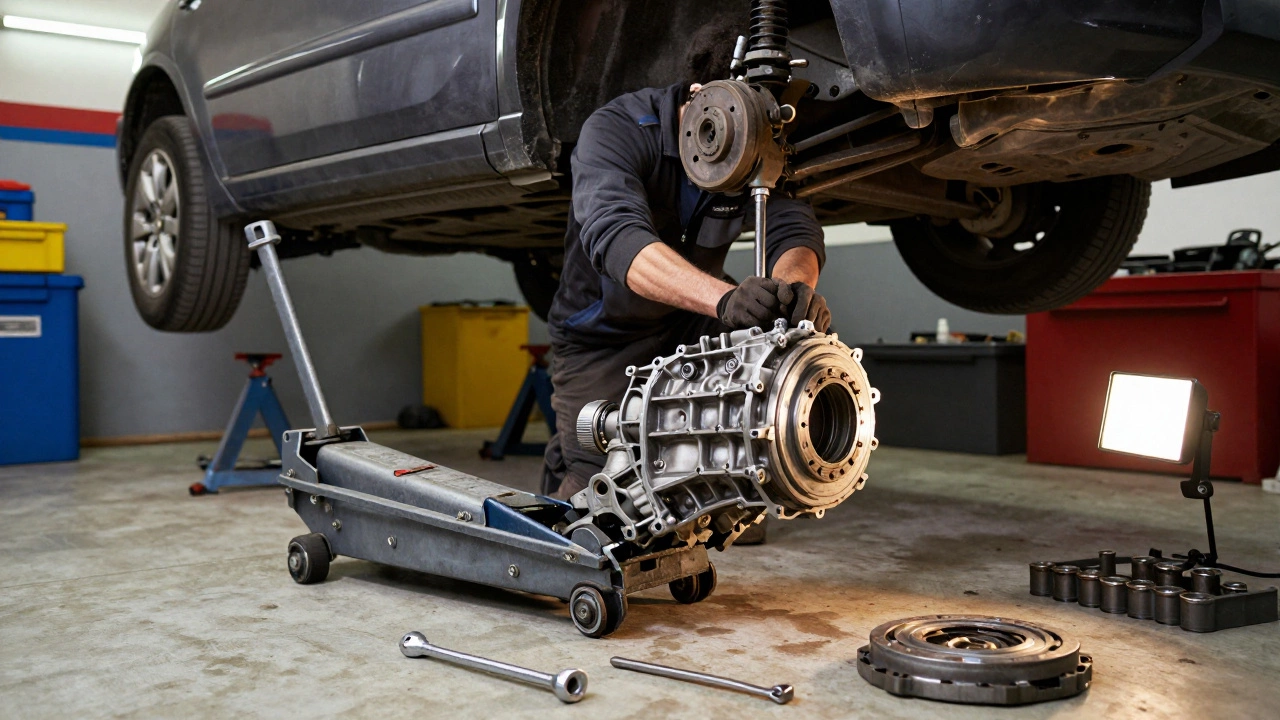
To understand why this job commands high labor rates at garages, you have to look at where the clutch lives. Unlike brake discs, which are accessible behind the wheels, the clutch is sandwiched between the engine and the gearbox. To reach it, you essentially have to separate the two heaviest components of your car.
This means the job involves more than just unscrewing a few bolts. You are dealing with:
- Engine Support: The engine needs to be held up securely while the transmission drops out. If the support slips, you could damage the engine mounts or worse.
- Weight Management: A typical manual transmission weighs between 30kg and 60kg (66-132 lbs). Lowering it safely requires a sturdy transmission jack.
- Precision Alignment: When putting everything back together, the input shaft of the gearbox must align perfectly with the pilot bearing in the flywheel. A millimeter off can cause vibration or prevent the car from starting.
If you have done this before, the process becomes routine. If it’s your first time, expect it to take significantly longer than the manual suggests. While a professional might spend 4-6 hours on a straightforward front-wheel-drive car, a DIYer should budget for a full day, possibly two.
What Exactly Is a Clutch Kit?
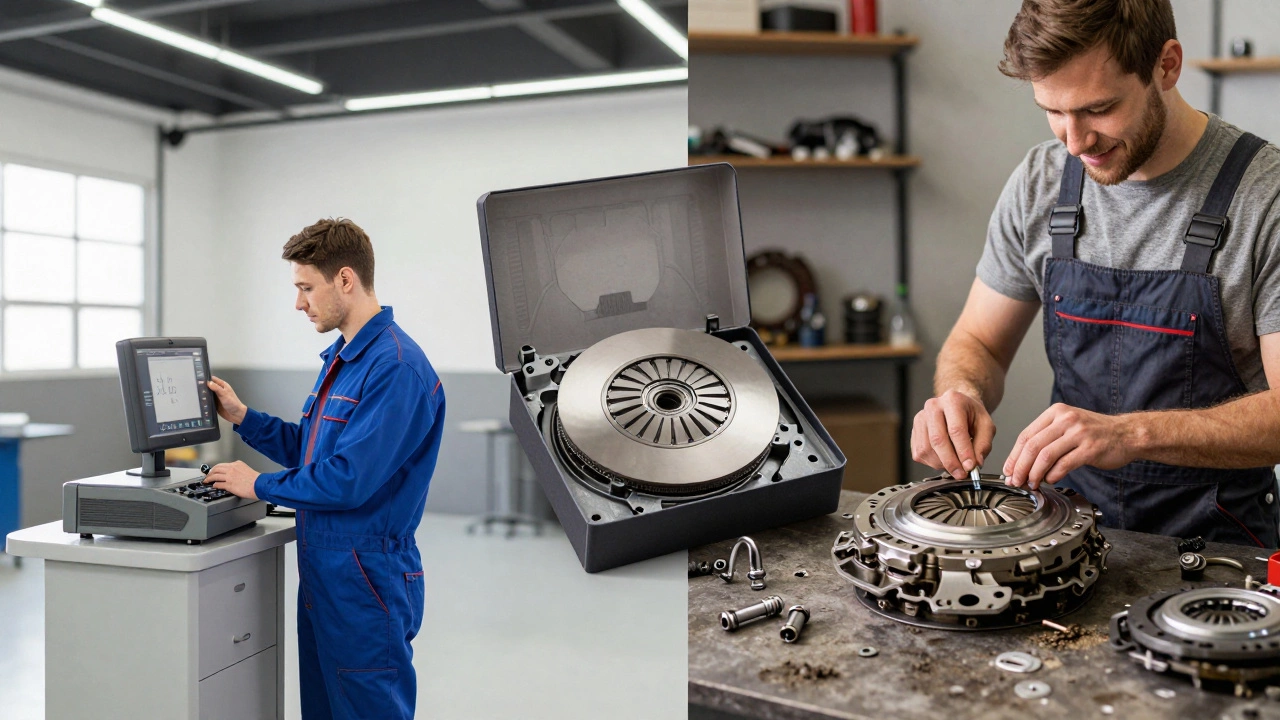
You won’t just buy a "clutch." You buy a clutch kit. Understanding the contents of this box is crucial because missing one small component can ruin the entire repair.
A standard clutch kit typically includes three main parts:
- The Clutch Disc: This is the friction material that grabs the flywheel. It’s the part that wears out over time.
- The Pressure Plate: This spring-loaded plate clamps the disc against the flywheel. When you press the pedal, a release mechanism disengages this pressure.
- The Release Bearing (Throw-out Bearing): This bearing presses against the diaphragm spring of the pressure plate to disengage the clutch. It takes significant heat and force, so it’s always replaced alongside the disc.
Here is the pro tip that saves headaches later: Always check if your kit includes a pilot bearing or bushing. This sits in the center of the crankshaft and supports the transmission input shaft. If your old one is worn, the new clutch will vibrate and fail prematurely. Some kits include it; others require you to buy it separately. Check the specifications before you order.
| Component | Function | Common Failure Signs |
|---|---|---|
| Clutch Disc | Transfers engine power to transmission via friction | Slipping under acceleration, burning smell |
| Pressure Plate | Clamps disc to flywheel | Soft or spongy pedal feel, inability to engage gears |
| Release Bearing | Disengages clutch when pedal is pressed | Squealing or chirping noise when pedal is depressed |
| Pilot Bearing | Supports transmission input shaft | Vibration at idle, difficulty shifting into reverse |
The DIY Reality Check: Tools and Space
Before you commit to buying a £150-£300 clutch kit, assess your garage. Do you have enough space to slide the car onto ramps or lifts? Can you maneuver a heavy transmission out from underneath without hitting your head or the floor?
Here is the essential toolkit you’ll need beyond your standard socket set:
- Jack Stands: At least four, rated for your vehicle’s weight. Never rely solely on a hydraulic jack.
- Transmission Jack: A regular bottle jack isn’t safe for lowering a gearbox. You need something with a wide base and adjustable arms.
- Engine Support Bar: Or a sturdy piece of wood and a jack to hold the engine up once the transmission is removed.
- Torque Wrench: Critical for reassembling engine mounts and transmission bolts. Under-tightening causes rattles; over-tightening strips threads.
- Gear Puller: Often needed to remove the old release bearing from the clutch fork.
If you don’t own these tools, renting them might cost nearly as much as paying for labor. Factor that into your decision. Also, consider the condition of your flywheel. If it’s glazed or warped, it will cause judder even with a brand-new clutch. Resurfacing or replacing the flywheel adds another step and cost.
When to Call a Professional
There are scenarios where DIY is genuinely not worth the risk. If you drive a rear-wheel-drive performance car, the transmission removal often requires dropping the driveshafts and sometimes moving the exhaust system extensively. On some modern vehicles, sensors and wiring harnesses run directly through the bell housing, making access a nightmare.
Also, consider your experience level. Have you ever replaced timing belts? Swapped wheel bearings? If yes, you’re probably ready for a clutch. If your most complex repair has been changing spark plugs, this might be a steep learning curve.
Professionals also offer warranties. If the new clutch fails in six months due to installation error, they fix it for free. As a DIYer, you’re on your own. A misaligned clutch can destroy a new disc in weeks.
Step-by-Step Overview of the Job
If you decide to proceed, here is the general workflow. Note that specifics vary by make and model-always consult your service manual.
- Preparation: Disconnect the battery. Remove any underbody panels obstructing access to the transmission.
- Disconnect Linkages: Unbolt the clutch cable or hydraulic slave cylinder. Disconnect the gear shift linkage and electrical connectors (reverse light switch, speed sensor).
- Support the Engine: Place a jack with a wooden block under the engine oil pan or use a dedicated engine support bar.
- Remove Transmission Mounts: Unbolt the transmission from its mounts. Be careful-some cars have multiple bolts hidden in tight spaces.
- Lower the Transmission: Using the transmission jack, carefully lower the gearbox away from the engine. This is the most physically demanding part.
- Remove Old Clutch: Take out the old pressure plate and disc. Mark the position of the pressure plate relative to the flywheel for alignment reference.
- Install New Kit: Use a clutch alignment tool (usually included in the kit) to center the new disc on the flywheel. Install the new pressure plate, tightening bolts in a star pattern to ensure even pressure.
- Reinstall Transmission: Raise the gearbox back into place. Align the input shaft with the pilot bearing. This may require gentle persuasion with a screwdriver through the bell housing.
- Reconnect Everything: Bolt the transmission mounts, reconnect linkages, sensors, and cables. Double-check all torque specs.
- Bleed Hydraulic System: If your car uses a hydraulic clutch, bleed the master and slave cylinders to remove air bubbles.
Cost Comparison: DIY vs. Garage
Let’s talk money. In the UK, a clutch replacement at a dealership can easily exceed £800-£1,200, including labor and parts. Independent garages might charge £500-£700. By doing it yourself, you save primarily on labor, which accounts for about 60% of the total cost.
Your costs will be:
- Clutch Kit: £100-£250 depending on brand (Luk, Sachs, Valeo are reliable choices).
- Flywheel (if replaced): £150-£300.
- Fluids and Consumables: £20-£40.
Total DIY cost: £270-£590. That’s a significant saving if you value your time less than £100 per hour. But remember, mistakes are expensive. Stripping a bolt or cracking a transmission mount can quickly erase those savings.
Maintaining Your New Clutch
Once you’ve installed the new clutch, treat it well. The bedding-in period is critical. Avoid aggressive acceleration, hard cornering, and riding the clutch for the first 500 miles. This allows the friction material to properly seat against the flywheel.
Bad habits kill clutches faster than mileage does. Resting your left foot on the pedal while driving, even lightly, creates drag that wears out the release bearing and disc. Learn to rest your foot on the dead pedal instead.
Regular maintenance of the hydraulic system (if applicable) ensures smooth operation. Top up the clutch fluid reservoir with the correct specification fluid, usually DOT 4 or DOT 5.1, as recommended by your manufacturer.
How long does it take to replace a clutch?
For a professional mechanic, it typically takes 4 to 6 hours. For a DIYer, expect it to take a full day (8-10 hours) or potentially two days if you work slowly and carefully. Front-wheel-drive cars are generally easier than rear-wheel-drive models.
Can I replace just the clutch disc?
Technically yes, but it’s not recommended. The pressure plate and release bearing wear out in tandem with the disc. Replacing only the disc risks premature failure of the other components, leading to another expensive repair soon after.
Do I need to resurface the flywheel?
It depends on the condition. If the flywheel shows signs of overheating (blue spots), warping, or deep scoring, it should be resurfaced or replaced. A damaged flywheel will cause the new clutch to judder and wear unevenly.
What are the signs of a failing clutch?
Common signs include slipping (engine revs increase but car doesn’t accelerate proportionally), a burning smell, difficulty shifting gears, a spongy or low clutch pedal, and unusual noises when pressing the pedal.
Is it cheaper to replace a clutch myself?
Yes, significantly. Labor costs make up the majority of the price. DIY can save you £300-£600, provided you already own the necessary tools and have the mechanical skill to complete the job correctly.
Replacing a clutch is a rite of passage for many car enthusiasts. It’s challenging, dirty, and physically demanding, but deeply rewarding. If you approach it with respect for the complexity and prepare thoroughly, you’ll save money and gain a valuable skill. Just remember: measure twice, cut once, and torque everything to spec.